Before launching an online store for your school, it's essential to configure the payment settings. By integrating with Stripe, a renowned platform for online payments, you'll be able to start accepting payments effortlessly.
Step 1: In your publisher dashboard, navigate to the Storefront Settings tab.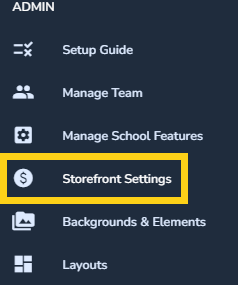
Step 2: Select the Connect with Stripe button.

After a brief moment, a new window will appear. Add a company email address to link to your Stripe account -- either an address already associated to Stripe, or a new email address if you have no Stripe account or want to set up a new address.

Step 3: Finalize your Stripe Connection
Complete the Process with Stripe's Guide: Stripe provides an intuitive tutorial to guide you through either connecting or registering your account. Follow their steps to finalize your setup.
Need Assistance? Stripe boasts robust customer support for any hiccups during account creation. Additionally, feel free to reach out to us if you're uncertain about subsequent steps.
Step 4: Business & Tax Steps
Upon successful completion of your Stripe setup, you will be prompted to add details.
a) Configure your business address. This ensures seamless communication wtih your Stripe account when a transaction occurs.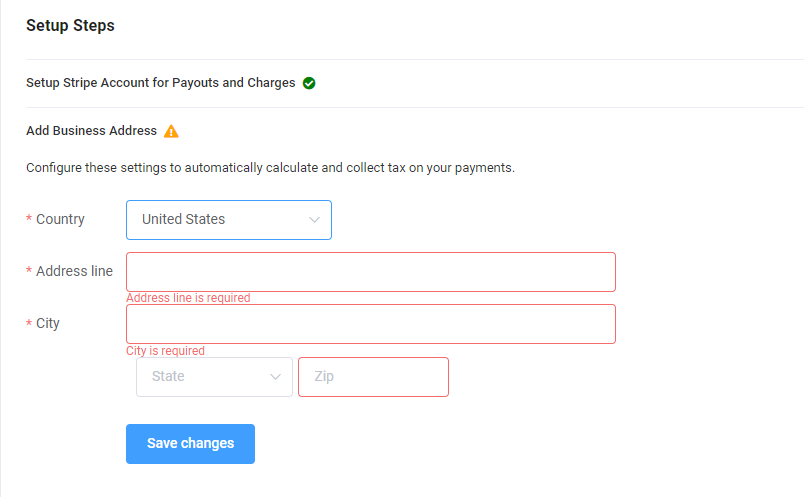
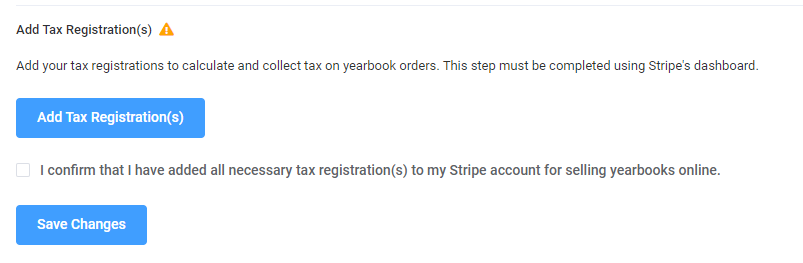
b) Return to your Stripe account and complete the tax registration process. This step is exclusively managed within your Stripe account and is mandatory for selling in the United States. Once you have successfully configured the tax settings, please tick the confirmation box to verify the completion of this operation. Finally, click "Save Changes" to conclude the Stripe setup process.
Step 5: Setup complete!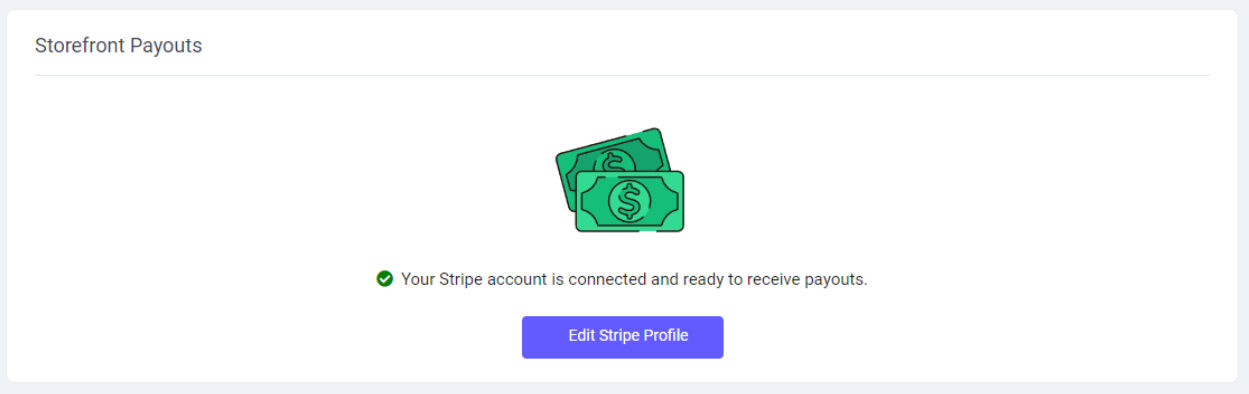
Was this article helpful?
That’s Great!
Thank you for your feedback
Sorry! We couldn't be helpful
Thank you for your feedback
Feedback sent
We appreciate your effort and will try to fix the article